Mon-Fri 7:00 AM - 4:00 PM    Sat-Sun 8:00 AM - 1:00 PM
(03) 9402 6483

Call us today!

Child Care Centers And Kindergartens

newsTitle Learn More

NOTE:
Before installing the turf, you’ll need a base consisting of 2 – 3 inches of compacted and level decomposed granite or a quarter of minus road base. You will be also needing a typical Infill to help the grass blades to stand up. You will also need a turf rake / Power broom to brush the infill down into the turf.
You need to plan it all out on paper. Draw up a simple sketch of the area to be covered and measure it out. (The turf can be cut to length, so determine the best layout using your sketch to keep waste to a minimum).
Move it to an area that has an enough room to it out, preferably in the sun. (It needs to be warmed up and expand before you install it.)
REMEMBER:

  • You also need to trim the ends of each piece where they will be seamed together in a way that mimics the stitching pattern on the back of the material
  • When moving the turf to the job area roll them up and carry them to the site rather than dragging them. Dragging can damage the turf and lead to problems down the line.

 
STEPS:

  1. Roll your sections out per your plan and line up your seams.
  2. Once everything is in place you can rough cut the excess turf around the edges. (Leave about 4 inches from where you’ll make your final cut, which will happen after you’ve completed your seams.
  3. Fold back one side of the turf and slip your seam tape underneath the opposite side.
  • Align the tape so that it divides the seam as evenly as possible.
  • Mark a line down the center. (This will help guide your application, preventing the glue from being forced up through the seam and into the blades.
  • Fold back both sides of the turf so that the tape is fully exposed.
  1. Using an S pattern, apply the glue down one side of your marked line keeping the glue about the quarter of an inch from the seam.
  • Do the same for the opposite side.
  1. To activate the glue, you will need to mist it with water using the spray bottle. Just enough dampen it will do. (Applying too much water can limit the effectiveness of the glue)
  • The Glue will set within 15 minutes after misting, so you want to join the two sides immediately.
  • Start at one end and carefully fold the two sides together. (Try to keep the blades from being folded under or caught in between the seam.)
  • Once both sides have been secured to the seam tape apply pressure to the seam with your feet or use a weighted roller commonly used in vinyl flooring installation.
  1. Once the seam is complete, you can make your final cuts around the perimeter. (Use the quality utility knife and replace the blades often)
  • Before you make cuts around the corners make structurally cuts in the fabric from the backside. (Doing it will make it easier to make the final precision cut, especially when you’re cutting to a curb, pavers, or other surface.)
  1. After finishing all your final cuts, you’ll need to nail down the perimeter edge of the turf using the 6-inch steel nails.
  • When you part the blades, you’ll see gaps in the pattern. This is where you place the nail. (You can also use another nail to help you spread the blades apart and prevent them from getting caught under the nail head.)
  1. Apply your infill. Using a drop spreader will help distribute the materials evenly.
  • Once your infill is down brush it in using a power broom. (Continue to brush it in until you can no longer see the infill on top of the turf)
  1. And the final step is applying water to the entire turf area, so the infill settles down in between the blades.

AND YOU HAVE YOUR SYNTHETIC GRASS ?


Please click this link to see our Synthetic Grass Products: https://nicebackyard.com/nice/product-category/synthetic-grass/

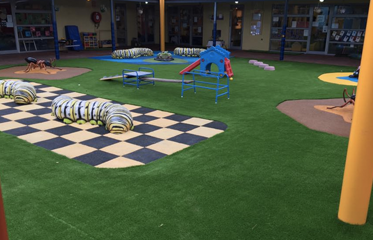
Many people who owns a backyard / lawn wants to install a mini golf, they want to try it at home so that it wouldn’t be hassle for them to go all the way to golf courses, this way they can play golf right at their own place without going or driving to far places. This the reason also that some people were very eager to have their own golf and did it through DIY but did not go exactly what they want and resulted to a disaster. We do all know that when it comes to installing a Putting Green Synthetic Grass there are steps that needs to follow and tools to use so that the outcome will be amazing. And if you can’t do it by yourself, no need to worry as Nice Backyard is here to help you solve your problem. We install, supply and deliver our good and best quality Putting Green Synthetic Grass at a good price too. We will also give you some tips and steps on how to install the Putting Green so that you will have some information and if you are ready to do DIY you can do it perfectly like a pro.
 
TOOLS:
Hand Tamper
String Trimmer
Safety Glasses
2×4
3 Foot Level
Yard Rake (with flat metal side)
Leaf Rake
Square Nose
Shovel and Hand Trowel
Putting Green Synthetic Grass
 
STEPS:

  1. Determine size & location
  • You will be needing to keep the width of your turf in mind when designing your putting green.


  1. Clear (&Dig) area for sub-base
  • Prepare the area by clearing the area of grass and other ground vegetation material then digging down to your desired sub-base depth


  1. Distribute base material
  • Distribute the sub-base materials evenly. Of course, you want to manipulate the sub-base material to incorporate the desired contours and slopes of your design. Always keep in mind that when creating contours that the water will run off top and you do not want to have any “soup bowls” in the middle of your putting green.


  1. Compact base material
  • Most common way to compact the sub-base material is by using a vibratory plate compactor, or a ride-on double drum roller. You can be able to rent either one at your local rental store.


  1. Determine placement of sleeves
  • Once you have the sub-base compacted and your contours the way you want them, locate where your sleeve/cup placements will be. Take note that you should allow a distance from the edge of the putting green to the sleeve/cup


  1. Dig holes for sleeves
  • Use a shovel and dig down roughly 10”


  1. Place Sleeves
  • Place your sleeve (height = 12” tall) in the hole. Fill in around the sleeve and compact small amounts of aggregate until you have a solid base. Once the aggregate is added and compacted it should have 2” of the sleeve still exposed. At this point, take a little more aggregate and add a small mound of it around the sleeve. Using a hand tamper, tamp the sleeve and the added aggregate down to create one smooth flowing base.


  1. Lay turf over sub-base
  • Maneuver the turf over your sub-base. Remember try not to disturb the base.


  1. Ready the turf for seams and seam it
  • Trim the manufactured edge off the roll of turf. Once you have seamed the edges cut, bring the edges together and check the entire seam to make sure that the turf fits together. If the seam looks good, glue the two pieces together. Flip each edge of the turf over to expose your base, just make sure that the seaming cloth will not move while applying the glue. Pay close attention to each edge while seaming it together so that you don’t matte any fiber into the glue.


  1. Cutting outer edge
  • Its highly recommended that you use a sidewalk chalk and lightly scribe your design onto the top of the turf. Take your time when cutting your turf, follow your mark and change the blade often so that the cuts remain smooth and on the line.


  1. Secure outer edge
  • Take either sod staples / galvanized nails and nail them into the turf’s edge. Make sure not to hammer the nail in too hard so that it won’t create an indentation into your base.


  1. Top Dressing
  • Use a drop spreader and spread the sand infill over the putting green turf. Use a plate compactor to vibrate the sand into the fibers of the turf. You can also spray a little water on the green after the infill process, this will help wash off the dust from the sand bringing the turf back to its true natural green color.


  1. Finished product and Maintenance
  • The final steps will be how creative you want to look your Putting Green Turf and always remember to maintain your grass if you want it to last long and still looks new.


With all this information and ideas, you can now do your own golf course and install the Putting Green Synthetic Grass just like us from Nice Backyard.


Please click this link to see our Synthetic Grass Products: https://nicebackyard.com/nice/product-category/synthetic-grass/

0