(03) 9402 6483
Call us today!
My Account
Manage orders
Call us today!
Manage orders
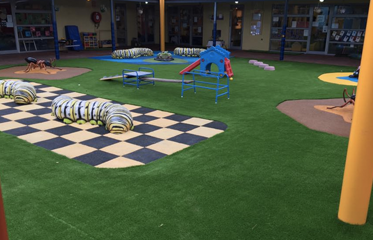
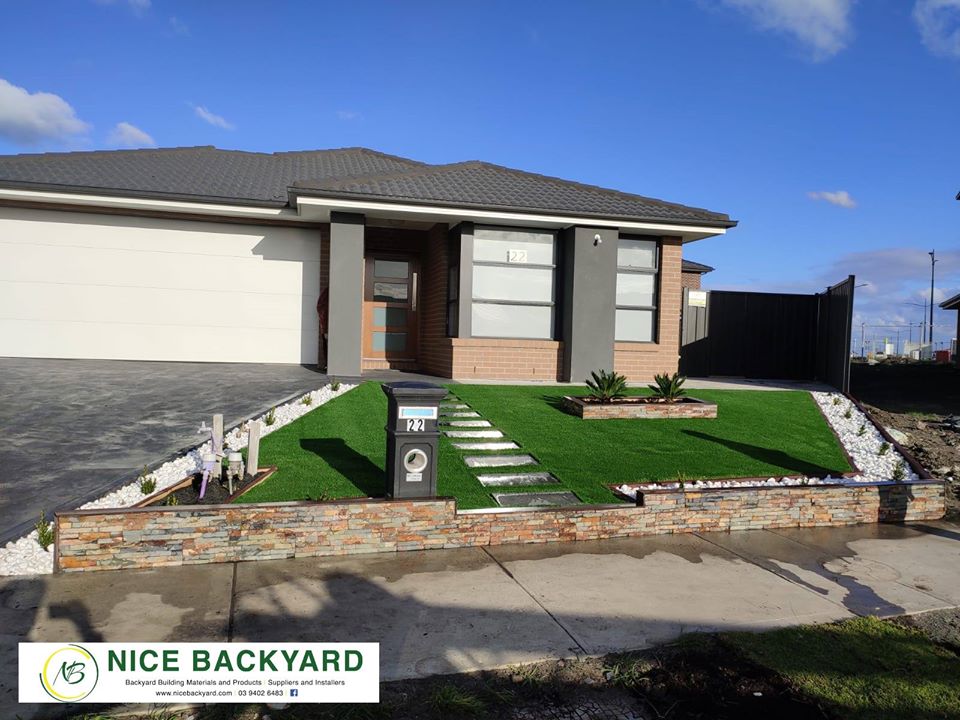
Installing Artificial Grass may just be the perfect way to give your tired looking garden a facelift. Old worn looking garden can easily be transformed into lush green grass that’s perfect for entertaining your friends and family, and for the kids to play on all year round – and of course, it’s a pet friendly too. As for parents who wants to see their children play around onto their garden, their safety is the main priority that’s why parents try and install Shock Pads underlay to their Artificial Grass because of its obvious benefit of being soft and springy underfoot which is perfect for kids playing around. Considering in installing Shock Pads underneath an artificial grass, it is extremely important to choose a good quality foam. Try to avoid recycled foams as they tend to absorb moisture, causing them to expand and contract. The smell of the dog/cat urine can become trapped in the foam making the odor very difficult to remove. Therefore, always ensure to choose a foam underlay that has a built-in draining holes that allow liquids to run through freely, without being absorbed.
Providing safety measures should an accident happen, that’s why shock pads are ideal for areas like playgrounds and schools or where any play equipment is installed. Shock Pads comes in 25mm thickness, comes in sheets of 1.1 x 1.5m and allows for a Critical Fall Height of 1.4m. if required it can also be doubled-up to create a 50mm Shock Pad to allow for up to a 2m Critical Fall Height.
Here are the steps on How to Install Shock Pad under Synthetic Grass:
Step 1 –
Remove existing earth, dirt and sand down to the required depth. This includes removing the existing grass area, its root base and a section of soil underneath. This is reduced to a specific depth to enable to install all the layers required to construct the high quality, fully porous fake grass system.
Step 2 –
Apply and fit the weed barrier on the exposed soil base. This is placed to prevent the growth of weeds and sinking of the aggregate across the whole base of the artificial lawn.
Step 3 –
Construct an aggregate base across the whole area where the artificial grass lawn is to be fitted. Then compacts the area using a compactor equipment.
Step 4 –
Level the base lawn area. Use a specific material including a screed bar to ensure a perfect level across the lawn area. This provides a strong, durable and professionally levelled base for precise installation of an artificial grass lawn.
Step 5 –
Shock-pad base fit. Fit the shock pad base on top of the aggregate base. Roll out the first piece of foam and cut to the required shape. You will find it easiest to cut all the foam and lay it in into position before you begin to glue anything. (TIP: As the foam comes on a roll, it will naturally try to roll itself back up soon as you let go of it. To stop this from happening, place a heavy object on each end to hold it in position.) Secure all the pieces of foam together, using a masking tape. Once the foam has been cut to shape and taped up, you can begin the gluing process. Depending on the temperature, you usually get around 30 minutes to work with the glue, so you’ll need to work reasonably quickly.
Step 6 –
Supply and fit the chosen artificial grass. Roll out the first piece of artificial grass, ensuring it covers the foam. Cut it into sizes. Take good care when cutting as you only get one chance to get it right. If you have joints, you’ll need to trim three stiches off the edge of each piece of grass, to form an invisible join. As with a normal artificial grass installation, you’ll need to glue the joints together. The easiest way to complete this step is to just glue the joints at this stage and then leave the glue to go off, before gluing the perimeter.
Step 7 –
Apply strong, durable quality glue to all the edges. Now that any joints have been secured, you’ll be able to fold back the grass at the edges (without the joints coming apart) and apply a layer of glue to the entire lawn perimeter. Use the same methods that was used when securing the foam underlay. Ensure that the glue runs continuously along every part of the perimeter, without leaving any gaps. These gaps will be potential weaknesses where it may be possible to lift the grass. To ensure the grass and foam bond sufficiently, it’s advisable to stay off the grass for the next couple of hours, to prevent the fake grass from moving around underfoot.
Step 8 –
To finish, apply and mechanically brush silica sand infill to your grass. To provide exceptional stability and protection of the entire installation, a silica sand infill is applied with a special drop spreader and then mechanically brushed it. This product is an essential part of the installation process. The silica sand not only maintains the lawn, it also ensures it will remain stabilized and prevents it moving or ripping when exposed to extremely hot weather. Every artificial grass has a very slight pile direction and this step should be done by brushing into the pile, which will lift the fibers.
Now you can step back and enjoy the result ?
Please click this link to see our Shock Pad Products: https://nicebackyard.com/nice/product/10mm-shock-pads-for-use-under-turf/
A gazebo or a Balinese Hut is a freestanding, open garden structure sometimes hexagonal or octagonal in shape with a roof. It’s the perfect way to create your own tropical paradise at home. Most gazebos are constructed of wood or metal and have built-in seating inside the sheltered area. To add a sense of enclosure and privacy, latticework or outdoor curtains or drapes are sometimes used. In a garden setting, gazebo can serve as focal point that offers views while providing shelter from the sun.
Investing in a gazebo may seem a little expensive for you can only use it in the summer and the rest of the year. This does seem like a waste of money, but you couldn’t be more wrong. Gazebos can be used all through the year, but you’ve got to know how to use them and for what purpose. Here are some tips on how to use your Gazebo in a different way:
As you can see, when it comes to relaxing outside, a gazebo is the perfect getaway. Just sit back in the gazebo in complete comfort in the shelter provided multi-purpose investment.
And if you haven’t thought yet where to purchase a good quality Gazebos, Nice Backyard is here to help you. As we supply, install and deliver Premium Gazebos for our customers.
Please click this link to see our Canopy & Gazebo Products: https://nicebackyard.com/nice/product-category/canopy-and-gazebo/
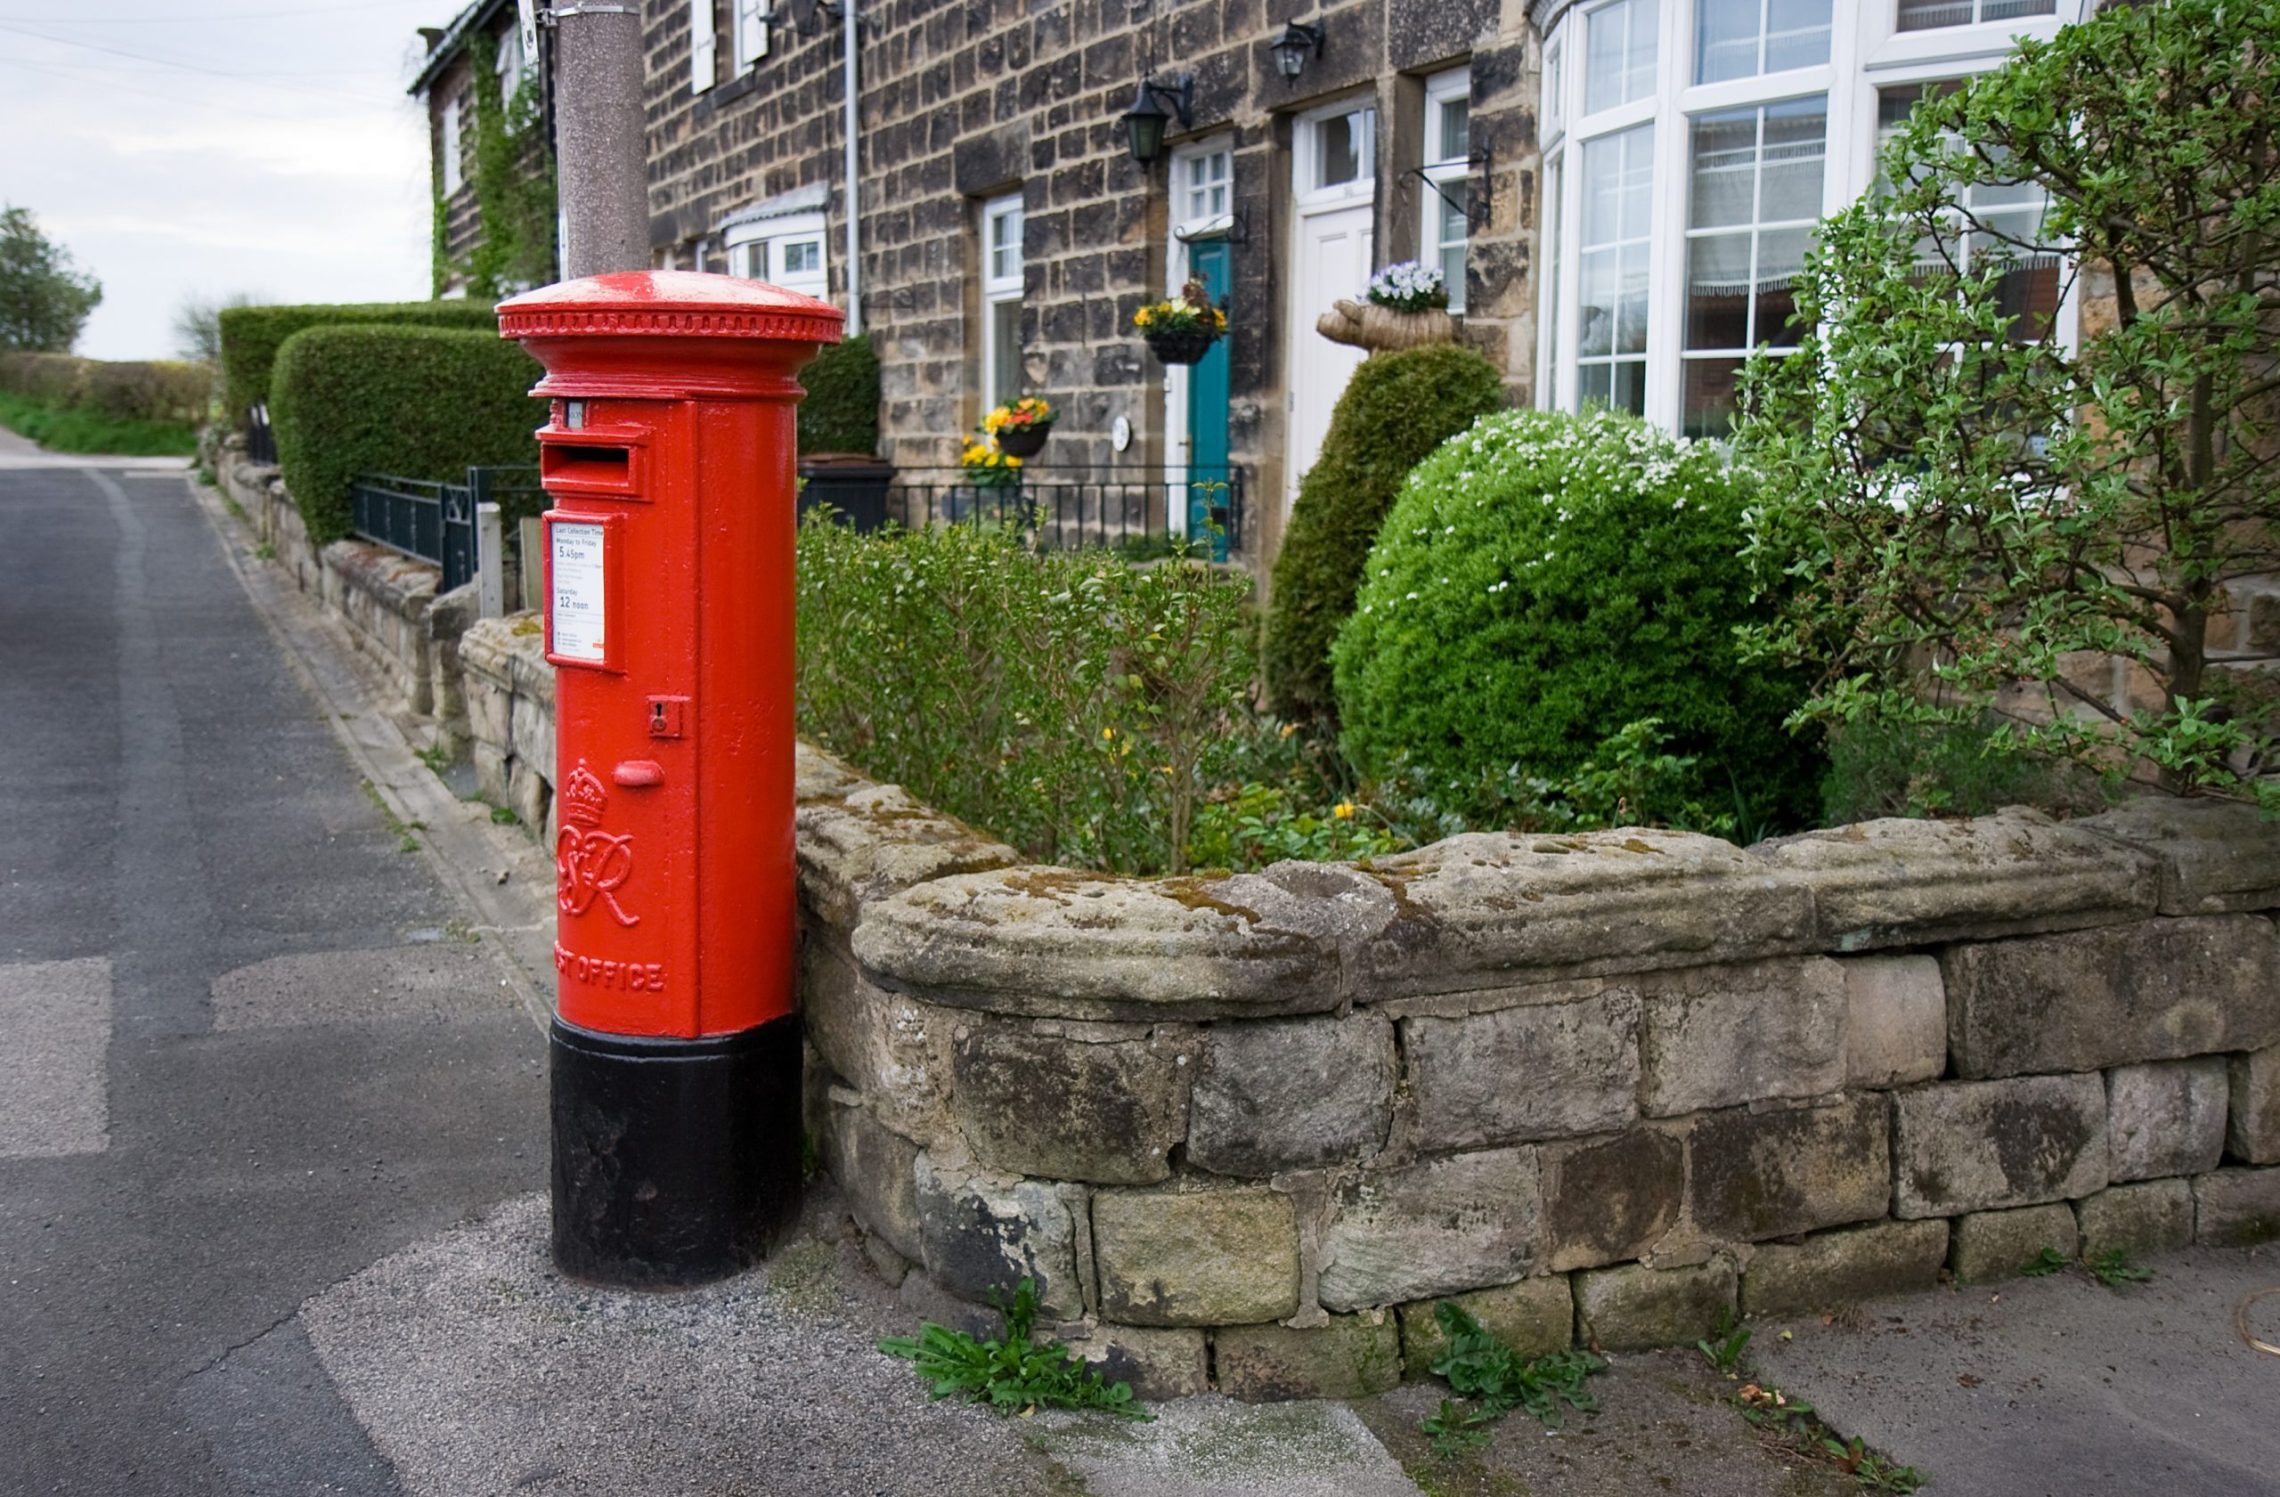
Most of the people ask the question about How to maintain your letterbox or maintain letterbox? We try to answer this question and try to remove your confusion in this blog.
All Letterboxes are finished to a high-quality level, and to maintain that finish throughout the life of the product, it requires some regular simple maintenance. Your letterbox says everything about you, so it should always keep it nice and clean.
For stainless steel letterboxes, it is recommended to regular cleaning every 3-4 months with a regular stainless-steel cleaner. This will remove any corrosive residue from the atmosphere. Hinges on doors in stainless plates require a regular light coat or similar spray to maintain their integrity. Locks may need some proper lock lubricant from time to time.
Even though it doesn’t seem, your letterbox needs the care to make it always look clean and shining, because it’s continuously weather-beaten. There are different kinds of products to be used for this aim, that should possibly be neutral and mild.
The usage of aggressive cleaning agents can, as a matter of fact hopelessly ruin your letterbox, corrosing the protective covering film.
To perfectly clean our letterboxes, here are a few steps:
a. Remove all the post from your letterbox so that it doesn’t get wet.
b. Damp a rag with cool water and pour some neutral detergent. Rub the whole surface with care, internally and externally.
c. Rinse the whole internal and external area to remove all traces of soap.
d. Wipe with a dry cloth to avoid the appearance of stains
If you live in a seaside area you must take particular care for the condition of your letterbox. In fact, here salt and sand may deposit on the surface and wear it out. In this case, our advice is to use neutral and mild cleaning products, following the steps given above.
At the first step of the cleaning phase, we recommend you wipe the letterbox with a damp cloth multiple times until the material has regained its original brightness.
To maintain letterbox and to make durable for the years you need to care and clean your letterbox on a regular basis. We hope that the information above helped you maintain your letterbox like it’s a brand new ?
Feel free to contact for any confusion regarding install a new letterbox or choosing the right letterbox.
If you want to buy new letterbox or mailbox please click this link to see our Letterbox & Clothesline Products.
While jobsite safety is a year-round priority, landscape contractors too face unique challenges during the summer. Hot temperatures can cause body temperatures to rise to dangerous levels. This can be especially threatening if you’re working outside, but it’s equally important to stay cool indoors if you’re working in an area with limited air movement and no breeze. Thousands of workers suffer from heat illness each year. Environmental heat is a recognized hazard, that’s why prevention and planning is crucial. It’s not just the plants and your lawn that needs some tips for maintenance during the Summer season of course Landscape Contractors too needs some tips to prevent heat related during this season.
Here are 9 Tips to preventing heat related during summer:
Remember to develop a heat‐related illness prevention plan that will keep your team hydrated and healthy all summer long. You may be aware that it’s going to be hot but remember to prepare yourself for how hot it will be during scheduled work activities and use the information above to determine which preventive measures should be taken.Educating yourself and your team on how to stay safe in the hot summer months is very important.
Landscape companies often operate on a narrow profit margins and must contend with hurdies related to labor, regulations and growth. Some company owners choose to wing it, dealing with each issue as it rises. While that might work when times are good, those companies typically don’t weather the storm of market downturns or other calamities. Addressing challenges head on with well-thought-out plans is like investing in an insurance policy. To get started in your preparations, here are some common problems and potential solutions.
Here are the list:
Do I need a permit for a garden shed is one of the most commonly asked questions when customers are wanting to install it for their garden. Most small garden sheds are exempt or complying developments by Councils and do not require you to apply for a Building Permit or Development Application. Councils throughout Australia are relaxing the requirements for shed building permits. The objective is to reduce red tape and to enable Councils to concentrate on more important building approval and DA application tasks. This is good news for anyone who wants to build a back-yard garden shed. There is no simple answer to this as there are a few factors to consider when purchasing and assembling your garden shed. The shed permit and approval process is being streamlined in all States of Australia. As of 2011 the streamlining process is still in flux and its best to contact your local council to get definitive answers.
Here are a few basic guidelines to follow:
As you would be aware majority of people position their garden shed against a Boundary/Fence, this is up to the property owner but please be aware the Council may ask you to move your shed as it should be the height away from the boundary (this would only occur if someone brought this to the Councils attention). If your Garden Shed is sitting on a timber floor it can easily be moved to another position if required so may be a safer option. However, if laying a custom-made concrete pad this can become difficult so please be aware of these rules prior to doing so.
If you are unsure whether your garden shed requires consent and unsure as for the requirements, it is best to consult your local council and discuss it. As for Nice Backyard, we supply and install Garden Sheds for our customers. We hope that the basic information above helped you how to know and where to check if your garden shed needs a council permit ?
Many people who are not Buddhists will buy statues to decorate their gardens. If you look at traditional statues you will see that the Buddha is ALMOST never seen touching the ground. Usually, the Enlightened One is depicted standing or sitting upon a lotus. Since you will not be using a wooden altar table in your garden, it would still be advisable to set up a small area where you can elevate the statue, if even just symbolically. One idea is to get several dozen small stones of the same shape. Build up a little mound upon which to place your statue. Occasionally, you may wish to burn three sticks of incense or place three flowers in front of your statue as a sign of respect and veneration. However, you don’t have to be a Buddhist in order to incorporate a Buddha statue for your home into your interior or exterior décor. Fortunately, many manufacturers offer statue finishes that will withstand the elements of nature, so they can be used either inside or outside your home. Buddha statues for homes and gardens can be used in Feng Shui applications to enhance your personal directions as well as energize weakened sectors of your life. It’s important to understand the symbols of each statue design so you can optimize the chi energy it attracts.
Symbolism of Buddha Statues
Different types of Buddhas are used to assist the chi energy move throughout your home and garden space. You have many choices of Buddha styles and poses. However, before you go purchase your own Buddha here are some information you might need to know which type of Buddha Face you need.
Here are some Materials that you need to know which Buddha you need:
You can capitalize on using a Buddha statue for your home and garden by selecting the material of the statue to match that of the sector.
There are countless representations of Buddha. Picking the right one can boggle the mind when shopping. However, each one denotes attainment achieved thru the mastering of a specific spiritual quality. Therefore, before purchasing one you might want to do some research on the meaning of the different poses. Then procure the statue best representing the desired attribute you need to master. Doing so will honor your personal Buddha Nature.
We hope that with the information above we helped you find the Buddha Face where its exact location will be. But if you are still in doubt where to purchase one, don’t hesitate to call us as we supply Buddha Face for all our customers ?
Bamboo fencing is renowned as an environmentally friendly and attractive option. It is an excellent option for fencing and construction. If you have chosen the Bamboo as your fencing material, you already know it can be a long-lasting. You’ve done your homework and discovered that with some upkeep and maintenance, bamboo fences can look good for years to come.
Bamboo fences are long lasting and durable. They require minimal maintenance and care. You can achieve a naturally aesthetic and exotic look around your home by installing a bamboo fence which you can purchase at Nice Backyard. It is also usable in a variety of climatic conditions. It is resistant to excessive heat, ultraviolet rays, rain and snow. It will also reduce pollution because it absorbs carbon dioxide and other toxic gases.
How to Maintain your Bamboo Fences:
Maintenance varies depending on how you installed your bamboo fence.
By regularly maintaining bamboo fences, you will lengthen its life and keep it intact for years to come. Our goal from Nice Backyard is to help you get the most benefit out of the Eco-friendly and dollar-saving fencing material.
Please click this link to see our Bamboo Panel Products: https://nicebackyard.com/nice/product-category/bamboo-panels/
Rubber Gym Mats are a really good way to protect your floor and your gym equipment for home gym areas as well as in professional fitness and sports facilities. Rubber gym mats are highly durable and will last for years under normal use. These gym mats made of rubber are a great choice for weight lifting floors and workout spaces where free weights are used.Rubber Gym Mats are design for continuous, high-impact action. These rubber mats are available in a variety of formats depending on the particular use, layout and permanence of the space. Rubber fitness matting is more resilient than typical rubber matting to be able to stand up to years of constant abuse from weights, aerobic exercise and heavy-duty equipment.And of course, Nice Backyard offers a wide selection of rubber gym matting options in many styles including rolls and tiles. Different thickness options provide varying amounts of gym flooring protection.
So here are How Rubber Mats made:
Building rubber mats is beneficial for the environment due to the number of used tires that are recycled during the process. There are factories which recycled up to tires each day.
Whether you need a floor mat that’s highly moisture-absorbent, one that aggressively scrapes soil from footwear, or even one that reduces fatigue levels for those who stand on it, Nice Backyard is your one-stop shop for all your floor mat needs. Contact now to see their varieties of Rubber Mats ?
Please cllick this link to see our Rubber Gym Mat & Flooring Products: https://nicebackyard.com/nice/product-category/rubber-gym-mats-flooring/
There are numerous benefits to using a rubber mat. They are highly durable, incredibly strong and versatile. Rubber mats can withstand significant weight and offers excellent protection to your sub floor. But there’s often one problem, the smell on rubber mat. When you install rubber mats indoors, you may quickly start to notice a rubber flooring odor. While some rubber materials have a stronger smell than others, that rubber odor can be overwhelming especially if you installed many mat in a smaller space, such as weight room or a garage. That smell can give people headaches, and if you are running a business then it could drive people away.
Rubber mats naturally give off an odor because they are made of rubber. Some people are highly bothered by rubber odors, while others don’t mind them so much especially if they choose a low odor option. Rubber mats that are made from vulcanized recycled rubber, can smell strongly, especially when they’re brand new. Some mats made of vulcanized rubber are treated to help it minimize the odor. Other mats, such as for outdoor used on playgrounds or barns carries a significant odor. When you smell the rubber from a mat, you are smelling the mat giving off volatile organic compounds (VOCs). Almost all scents and odors derive from VOCs. These compounds have been trapped in the rubber, but as the mat is exposed to the air and let in place for a while, the release of VOCs will slow down, and the odor will fade.
Here are a few tips on how to get rid of rubber smell:
Choose Appropriate Mats to make getting rid of Rubber Odor easier
Use a Neutral pH Cleaner as a Rubber Odor Neutralizer
Maximize Ventilation during Rubber Odor removal
Sunning will speed up Outgassing for Rubber Smell Removal
Store mats strategically to get rid of Rubber Smell
Be Patient when trying to Remove Rubber Smell
Tips for Business:
The smell won’t last forever, and the above steps can help to get rid of the rubber smell, so you can get back to enjoying the space even sooner. At Nice Backyard, we have a range of different Rubber Mats and are very good from smell point of view. Compared to other mats, Nice Backyard’s rubber mat’s smell goes away in few days. Contact now to inquire and check it for yourself ?
Please cllick this link to see our Rubber Gym Mat & Flooring Products: https://nicebackyard.com/nice/product-category/rubber-gym-mats-flooring/